Key takeaways
- You can turn original art into a playable game without becoming a programmer first. Start with one room, one goal, three player actions, one remembered state, and one ending. Use a no-code story tool for scenes and choices, a visual builder for movement and object interactions, or add technical help only when a tested prototype proves it is needed.
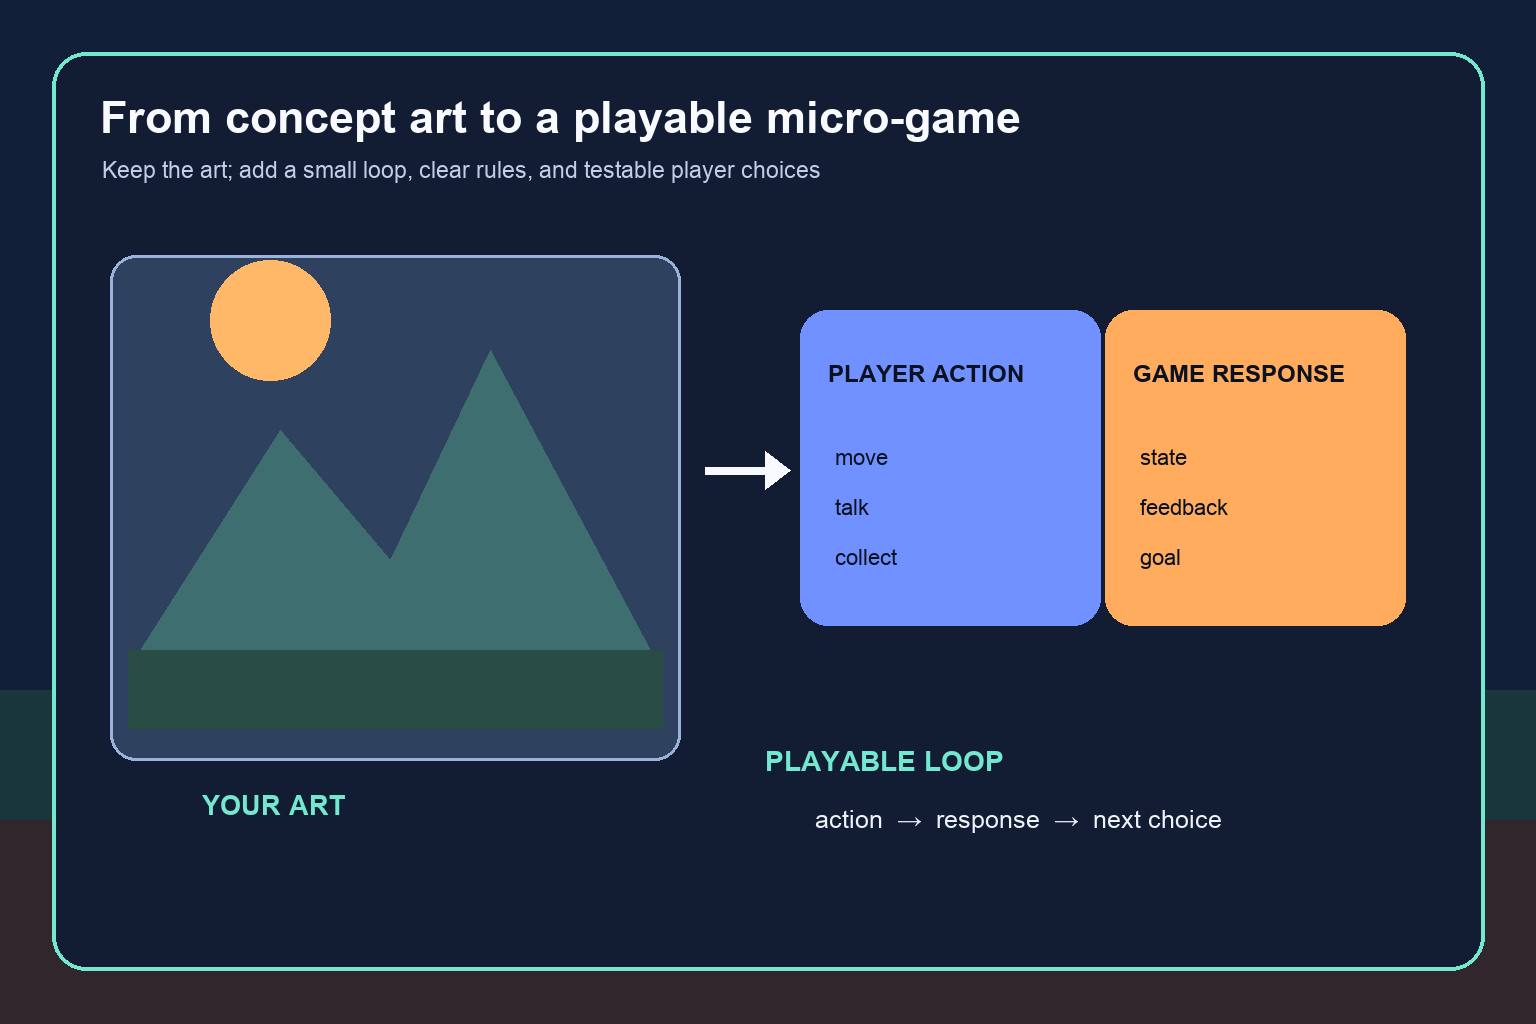
Yes—you can turn original character and environment art into a playable game without becoming a programmer first. The practical route is to shrink your idea into one short player loop, use a no-code story tool or visual game builder, and treat each artwork as a game asset with a specific job. Start with one room, one goal, three possible actions, one piece of saved state, and one ending. That is enough to prove that your art can support interaction.
The important shift is from thinking in pictures to thinking in actions and responses. A character portrait becomes playable when the player can talk to that character and the conversation changes something. An environment becomes playable when the player can explore it, find information, choose a route, or alter its state. You do not need complex combat, a giant map, or hundreds of finished illustrations to make that first experience meaningful.
What makes artwork playable?
Artwork is not automatically gameplay, but it already contains much of the raw material a game needs: a world, a cast, a mood, visual goals, and implied conflicts. Gameplay appears when you add four things around it:
- A player goal: something understandable to discover, reach, protect, repair, escape, or decide.
- Player verbs: a small set of actions such as move, inspect, talk, collect, combine, choose, or avoid.
- Rules and state: simple facts the game remembers, such as whether a key was found or a character trusts the player.
- Feedback: a visible, audible, or narrative response that confirms what the action changed.
Imagine you have painted an abandoned observatory, a masked astronomer, and a brass key. A static gallery presents those three works. A playable scene lets the player inspect the observatory, ask the astronomer about the locked dome, find or miss the key, and receive a different ending based on that state. The same art now participates in a cause-and-effect loop.
This definition also keeps your first project manageable. “Make an open-world fantasy RPG” is too broad to guide a first build. “Find the key and decide whether to trust the astronomer” gives you a goal, actions, state, and an ending you can test.
Example asset map: turn each artwork into a gameplay job
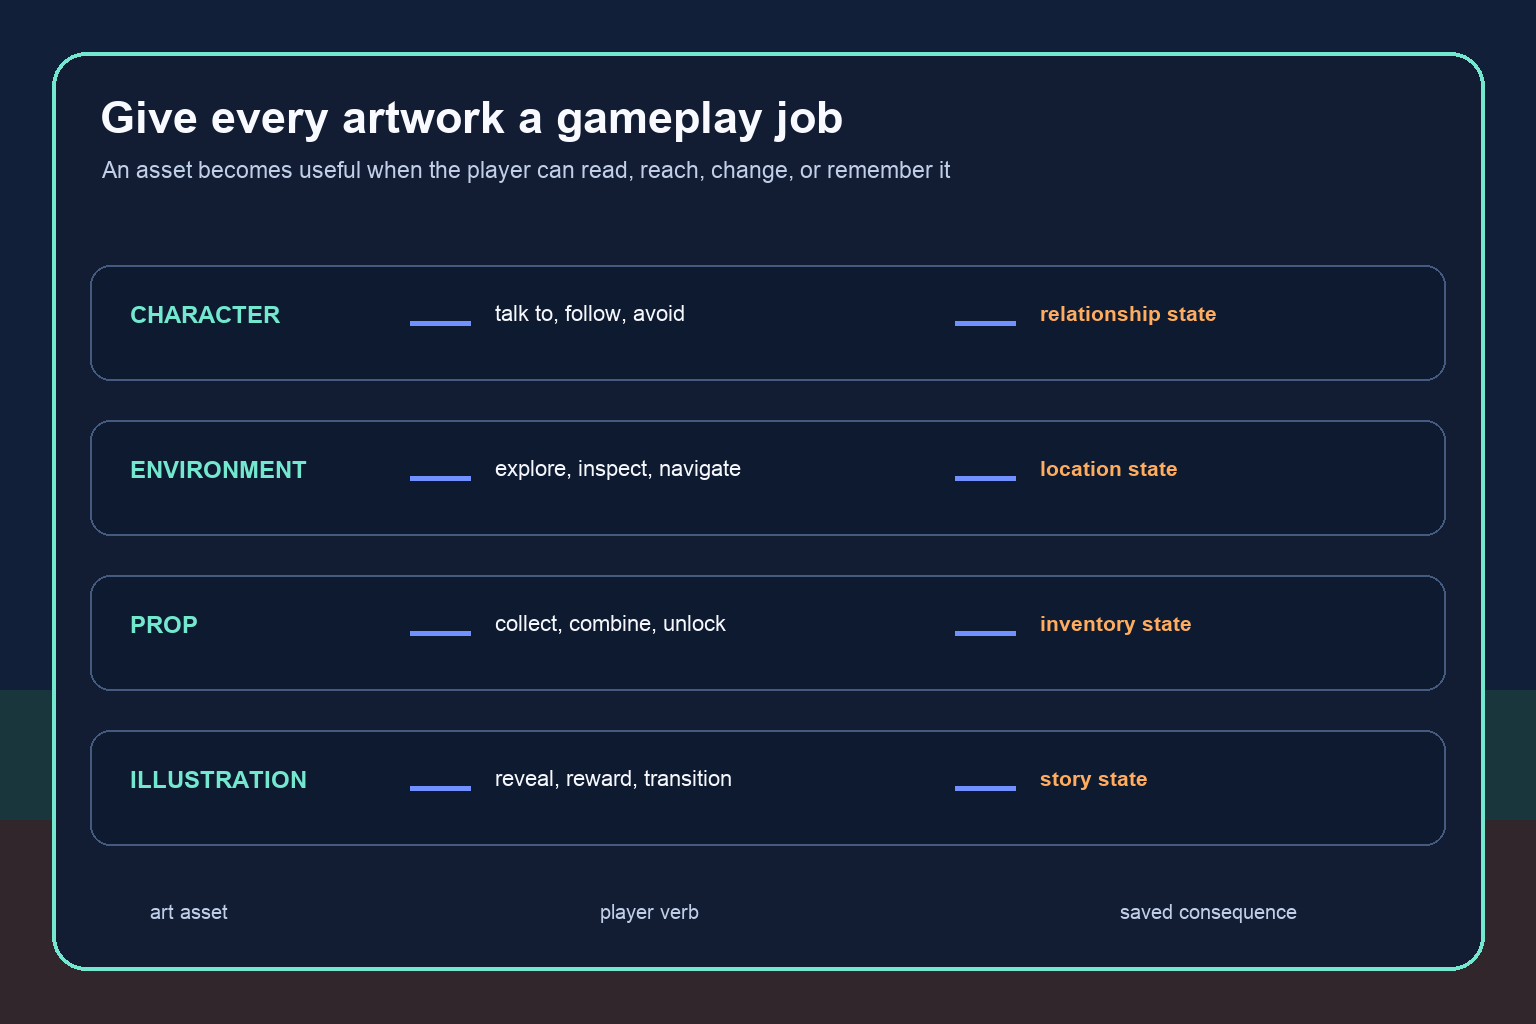
Make a simple inventory of the art you already have. Do not list only filenames. For every piece, write what the player can do with it and what may change afterward.
- Character art: Who can the player talk to, follow, help, distrust, or avoid? What relationship fact should the game remember?
- Environment art: Where can the player enter, inspect, navigate, or revisit? What location change should remain visible?
- Props and objects: What can be collected, combined, offered, used, or unlocked? Is the object a clue, a tool, or a reward?
- Illustrations and key art: Can the image mark a revelation, transition, memory, ending, or achievement?
- UI art and icons: Which player choices or resources need to be readable at a glance?
This exercise reveals gaps before you create more polished assets. You may discover that you have twelve character designs but no clear player goal, or many landscapes but no close-up props that support interaction. Fill only the gaps required by the first playable slice. Avoid producing an entire asset library for mechanics that have not been tested.
A useful asset note has three parts: what the player sees, what the player can do, and what the game remembers. For example: “The player sees a cracked mural, can inspect it, and the game records that the constellation clue was discovered.” That sentence is specific enough for a visual tool, a collaborator, or an AI-assisted workspace to turn into a scene requirement.
Decision checklist: pick the right no-code route for your game
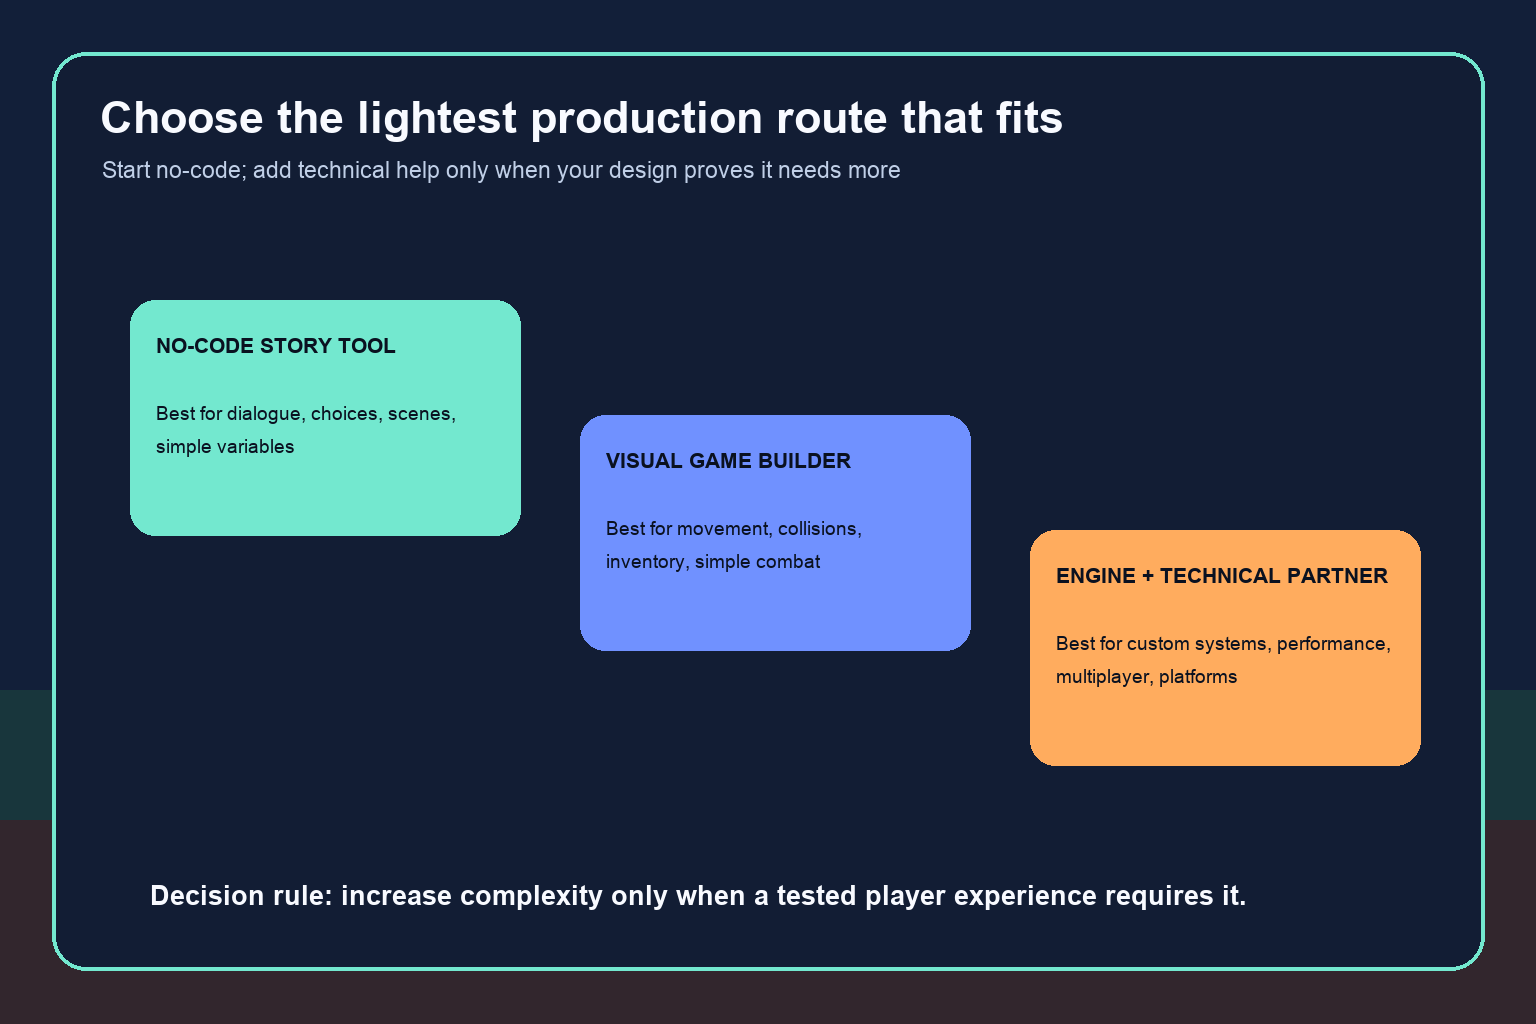
“No code” covers several different production approaches. Choose by the experience you want the player to have, not by the most impressive feature list.
Choose a no-code story tool for scenes and choices
This route fits visual novels, interactive stories, dialogue-led adventures, and illustrated choice games. It is usually the easiest starting point when your strengths are character art, backgrounds, writing, and worldbuilding. The core structure is a sequence of scenes connected by choices and simple variables.
Use it when movement and physics are not central. A scene can still feel game-like if choices reveal information, alter relationships, consume resources, and lead to different consequences. The limitation is that unusual spatial mechanics, custom combat, or highly dynamic simulation may exceed the format.
Choose a visual game builder for movement and objects
A visual builder fits projects where the player should walk through environments, trigger collisions, collect items, solve spatial puzzles, or operate a simple combat loop. Instead of writing code, you connect events, conditions, and actions through menus or node-like logic.
This route asks you to learn systems thinking even if it avoids programming syntax. You still need to understand statements such as “when the player overlaps the key, hide the key, set KeyFound to yes, and update the inventory.” That learning is realistic for an artist because it maps directly to cause and effect.
Add a technical partner only when the prototype proves the need
A programmer or technical designer becomes valuable when the project depends on custom combat, advanced camera behavior, complex AI, procedural systems, multiplayer, performance optimization, accessibility integrations, or a demanding release platform. Collaboration is not a defeat; it is a way to protect the creative direction while assigning specialized work appropriately.
Do not hire for a giant specification before you have a tested slice. A tiny prototype gives a technical partner concrete scenes, assets, player actions, and failure cases. It also makes estimates more meaningful and reduces the risk that engineering effort serves an untested idea.
Vertical slice workflow: build one room before a whole world
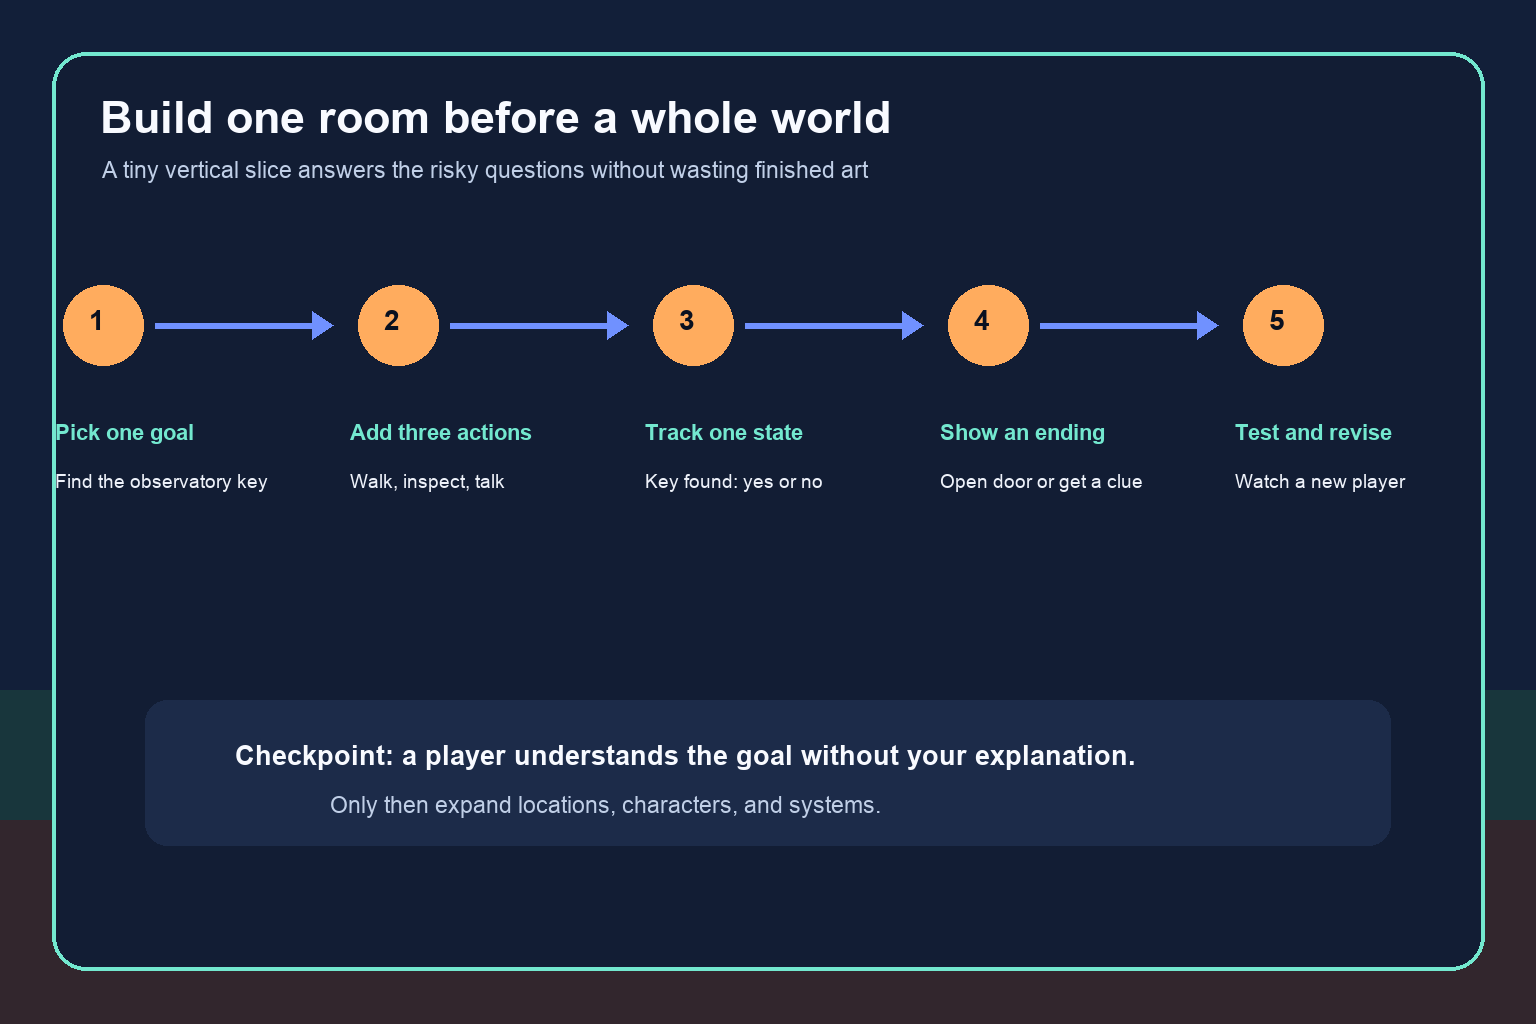
Your first vertical slice should take roughly five to ten minutes to play. It is not a trailer, an art portfolio, or a complete chapter. It is a small piece that proves the interaction loop, visual readability, and production workflow.
Use this five-step structure:
- Pick one goal. The player must find the observatory key before the dome closes.
- Add three actions. Let the player walk, inspect, and talk—or choose, inspect, and collect if you are using static scenes.
- Track one state. Record whether the key was found. Optionally track one relationship value.
- Show one consequence. The player opens the dome, receives a clue from the astronomer, or reaches a short alternate ending.
- Test with another person. Watch silently. If the player cannot identify the goal or understand the response, revise the scene before expanding.
Limit the slice to one environment, one or two characters, three interactive elements, one decision, and one ending screen. Reuse art when practical. A portrait can have two expression variants instead of a full animation set. A painted environment can use hotspots rather than requiring a complete 3D reconstruction.
The checkpoint is simple: a new player should understand what they can do and why the outcome happened without you explaining it beside them. If that works, you have the foundation of a game. If it does not, more content will usually make the problem harder to diagnose.
Prepare 2D artwork for game production
Keep your layered source files. Separate characters, foreground objects, backgrounds, effects, and interface elements when you expect them to move or change independently. Export clean copies in the dimensions and formats accepted by your chosen tool, but preserve the editable originals outside the project.
Use consistent naming. “observatory-background-night-v03” communicates more than “final2.” Give character expressions and object states explicit labels, such as “astronomer-neutral,” “astronomer-worried,” “door-locked,” and “door-open.” Consistent names reduce mistakes when a project grows.
Plan for different screens. Important text and interactive objects should remain readable on the smallest target display. Keep essential subjects away from crop-sensitive edges. Test compression, transparency, and scaling inside the actual playable scene rather than assuming an export looks the same everywhere.
Finally, distinguish approved assets from experiments. Once a character design or environment version is accepted, lock it for the current slice. Otherwise, constant visual regeneration can hide gameplay problems and create avoidable continuity work.
Write rules in plain language before building them
You can design game logic without writing code. Describe each interaction as a trigger, condition, action, and feedback response.
For the observatory key:
- Trigger: the player selects or touches the key.
- Condition: the key has not already been collected.
- Action: set “KeyFound” to yes and remove the key from the scene.
- Feedback: play a sound, show an inventory icon, and update the current objective.
For the locked dome:
- Trigger: the player selects the dome door.
- Condition: “KeyFound” is yes.
- Action: open the door and move to the ending scene.
- Fallback: if “KeyFound” is no, show a clear locked response and point back toward a clue.
Writing rules this way makes visual logic easier to build and easier to hand off. It also exposes missing cases. What happens if the player talks to the astronomer after finding the key? Can the key be collected twice? Does loading a saved game preserve the state? These are design questions, not merely programming questions.
Test clarity before adding content
Artists naturally notice composition, color, anatomy, and atmosphere. In a playable project, also test whether the visuals communicate interaction. Does an important doorway look reachable? Does a collectible separate from the background? Can the player distinguish decorative objects from selectable ones? Does the result of a choice appear quickly enough to feel connected?
Run three short tests:
- Goal test: ask the player what they think they are trying to do.
- Action test: ask what they believe they can interact with before they click.
- Consequence test: after the ending, ask why they think it happened.
Do not defend the design during the test. Record where the player hesitates, clicks repeatedly, or forms the wrong explanation. Revise the smallest responsible element: wording, contrast, staging, feedback, or rule logic. A clearer five-minute game is a stronger foundation than a confusing hour of content.
A realistic four-week starter plan
In week one, define the player goal, verbs, state, and ending. Inventory your art and select only the assets needed for one room. Make rough placeholders for anything missing.
In week two, build the complete interaction loop with temporary art. The slice should be playable from start to finish even if it looks unfinished. This prevents polish from outrunning design.
In week three, replace placeholders with prepared artwork, add feedback, and test readability. Keep scope frozen unless testing reveals a necessary fix.
In week four, run several outside playtests, correct the most common confusion, and package the slice for your intended audience. Then decide whether to expand, change tools, seek a collaborator, or keep the project intentionally small.
Your first success is not “I built my dream game.” It is “someone played a scene made from my art, understood the goal, made a choice, and saw a consequence.” Once that loop works, you can grow it deliberately.
Common mistakes to avoid
The biggest mistake is finishing a large volume of art before validating the game loop. Another is choosing a tool because its showcase looks impressive while ignoring whether its editing model suits your project. Also avoid building multiple mechanics at once, replacing approved art during unrelated revisions, and treating player confusion as a request for more exposition.
Be careful with rights and provenance when using generated or third-party material. Keep records for assets you did not create yourself, review each output before use, and confirm that the intended distribution is compatible with the source terms. For your own art, maintain backups and version history.
Most importantly, do not interpret “I cannot program” as “I cannot design systems.” You already make decisions about hierarchy, rhythm, focus, contrast, and visual storytelling. Game design adds goals, rules, state, and feedback to that same creative discipline.
Frequently Asked Questions
Can I make a game using only my drawings?
You can build a small illustrated game primarily from your drawings, but you still need a tool that provides scene structure, input, rules, state, and delivery. Begin with static backgrounds, character portraits, clickable objects, choices, and simple variables rather than animation-heavy systems.
What type of game is easiest for an artist with no coding experience?
A short visual novel, choice-based story, hidden-object scene, or illustrated point-and-click experience is often the most approachable because finished 2D art can be used directly and the logic can remain small. Choose the format that best matches the interactions your art suggests.
Do I need to learn programming eventually?
Not necessarily for a small project built within a no-code tool's supported patterns. Learning basic logic—triggers, conditions, actions, variables, and state—will still help. Custom mechanics or demanding release requirements may eventually justify programming skills or a technical collaborator.
How much art should I finish before prototyping?
Finish only enough to communicate one playable slice. Use rough placeholders for untested scenes and mechanics. Polish the selected assets after another person can complete the loop and understand the result.
Can I turn a painted environment into an explorable level?
Yes. The simplest method is to use the painting as a scene with interactive hotspots and transitions. A more spatial game may require separated layers, collision areas, a character sprite, camera rules, or reconstruction in 2D or 3D. Choose the least complex method that supports the intended experience.
When should I work with a programmer?
Bring in technical help when a tested prototype depends on custom systems, performance work, multiplayer, platform integrations, or behavior your chosen visual tool cannot express cleanly. A clear micro-game makes collaboration faster and less ambiguous.