Key takeaways
- You cannot complete the full Roblox Studio build-and-publish workflow entirely on a phone because Roblox Studio is documented for Windows and macOS. A phone can still handle pre-production: define the core loop, sketch the level, organize references, create an asset manifest, draft logic requirements, and write a test plan. Then move the brief to desktop Roblox Studio to import assets, integrate Luau, playtest supported devices, and publish through Roblox's official workflow.
Can you make a Roblox game entirely on mobile?
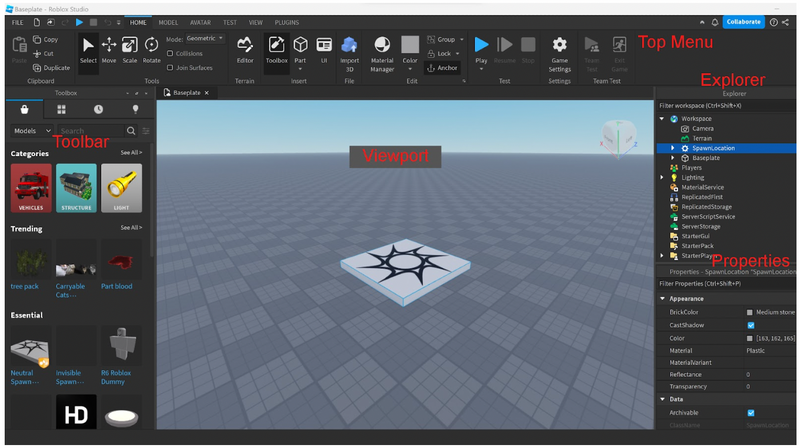
No—not as a complete Roblox Studio production workflow. Roblox's official setup documentation describes Studio as an application for Windows and macOS, so a phone is not a substitute for the desktop editor. A phone can still move the project forward: you can define the game loop, write a design brief, collect reference images, prepare an asset inventory, draft prompts, and create a test checklist. The actual experience still needs to be opened or assembled in Roblox Studio on a computer for import, Luau review, playtesting, device configuration, and publishing.
The useful way to think about mobile Roblox development is pre-production on mobile, production on desktop. This boundary prevents lost work and misleading expectations. It also gives you a practical next step even when you are away from a computer: finish a handoff package that makes the later Studio session shorter and more focused. If you need the broader beginner workflow, start with the complete Roblox game creation guide, then return here for the mobile-specific handoff.
Roblox's current platform boundary is documented in Roblox Studio setup. Treat that official page as the source of truth if supported operating systems change.
What works on mobile and what still needs a computer
Before opening any app, separate tasks by the artifact they produce. A mobile task should end in a brief, list, reference, decision, or review note. A desktop Studio task should end in a working place, validated script, tested input scheme, or published experience. That distinction is more reliable than asking whether a particular website happens to open in a phone browser.
| Task | Phone can help? | Desktop Roblox Studio still required? | Completion checkpoint |
|---|---|---|---|
| Define the core loop and audience | Yes | No | One-sentence loop with win and fail states |
| Draft a level map and asset list | Yes | No | Numbered rooms, obstacles, props, and UI states |
| Generate or organize reference assets | Sometimes | Yes, for import validation | Every file has format, scale, rights, and purpose recorded |
| Assemble the place and data model | No | Yes | Objects are placed and named inside Studio |
| Write and debug Luau behavior | Drafting can start anywhere | Yes, for integration and testing | Scripts run in the intended Studio hierarchy |
| Test controls and devices | Planning only | Yes | Keyboard, touch, camera, and failure states are tested |
| Publish the experience | No | Yes | Private build is published and reviewed before public release |
This table also limits what an AI tool should promise. A conversational game tool can help turn an idea into a prototype brief, reference set, asset concept, or logic outline. It should not be described as a verified Roblox-native editor unless product evidence proves that exact capability. SEELE is therefore positioned here as a preparation layer, not as a replacement for Studio.
Step 1: Turn the idea into a mobile-ready game brief
Start with one playable loop, not a long feature wishlist. On your phone, write five lines: what the player does, what changes after the action, how the player knows they succeeded, how they fail, and what makes them try again. This structure is small enough to finish in one sitting and precise enough for a later Studio session.
For example, a beginner obby brief might read: The player crosses six floating platforms, collects three keys, opens a gate, and reaches a finish pad. Falling returns the player to the latest checkpoint. The run should take two minutes on the first successful attempt. Add the intended controls, camera behavior, and a definition of done. A useful definition of done is observable: the player can spawn, understand the next target, recover after failure, and see a finish state.
Next, turn the loop into an asset and logic list. Record platforms, keys, checkpoint markers, gate, spawn location, finish feedback, timer, and reset behavior. For each item, label whether it is visual, interactive, or both. This prevents a later mistake where a pretty object is imported but nobody has defined its collision, ownership, or script behavior.
A conversational tool such as SEELE can help structure this brief or explore a 2D/3D prototype direction, based on its documented natural-language generation capabilities. Keep the output as planning material until it has been reviewed in the target Roblox workflow. Do not call an external prototype a Roblox project merely because it has block-style visuals.
Checkpoint: another person should be able to read the brief and explain the loop without you filling in missing rules. If they cannot, revise the brief before generating more assets.
Step 2: Prepare references and assets without pretending they are Studio-ready
Mobile asset preparation is useful when it produces a clean manifest. Create one row per file or concept with: name, purpose, source, rights, target format, expected size, pivot/orientation note, texture set, and review status. Even if an AI tool produces a model or image, the manifest should say that it is a candidate awaiting import review.
Roblox's official Importer supports common 3D formats including FBX, OBJ, and glTF, but format support does not guarantee that a model will look or behave correctly. Scale, orientation, mesh hierarchy, materials, textures, rigging, and collision still need inspection after import. Use the Roblox 3D asset preparation workflow when the project depends on custom props, and consult Roblox's Importer documentation for the current file rules.
Consider a low-poly tree asset. A weak mobile handoff is a file named tree-final-final.glb. A useful handoff says: decorative forest prop; glTF candidate; one trunk and one canopy mesh; intended height eight studs; pivot at ground center; no collision decision yet; texture rights confirmed; needs Studio import and performance review. That note takes less than a minute to write and can prevent several rounds of guesswork.
Keep versions immutable during the handoff. If you change the silhouette or texture, save a new version and update the manifest. Do not overwrite the only copy while someone is testing it on desktop. For FBX- or GLB-specific checks, link the handoff to the existing FBX to Roblox Studio workflow or GLB to Roblox Studio workflow.
Checkpoint: every candidate asset can be traced to a source, has a clear purpose, and is explicitly marked as unverified until it passes Studio import.
Step 3: Move the project into Roblox Studio on desktop
When you reach a Windows or Mac computer, begin with the brief and manifest rather than trying to remember what you decided on the phone. Create or open the intended experience in Roblox Studio, confirm the owner or group, and keep the first publish private. Roblox's official publishing guide explains that experiences begin with a start place and that publication connects the game's data model to the creator account.
Use this five-stage handoff:
- Create the place structure. Name the start place, folders, models, scripts, and UI containers before importing a large asset batch. The hierarchy should reflect the mobile brief.
- Import and inspect assets. Use Studio's Importer, read every warning, check scale and orientation, then verify materials, rigs, animation data, and collision. Reject or revise assets that do not match the manifest.
- Implement and review behavior. Convert logic notes into Luau in the correct server or client context. A generated script is a draft until it runs safely in the intended hierarchy. Check remote events, permissions, respawn behavior, and failure paths.
- Playtest on representative devices. Test keyboard, mouse, controller where relevant, and touch behavior through Roblox's supported testing workflow. Verify camera framing, button size, performance, checkpoints, and recovery from bad network or failed actions.
- Publish privately, review, then release. Follow the current Roblox publishing workflow. Confirm metadata, creator ownership, device support, audience settings, and applicable compliance requirements before changing visibility.
The key decision is not whether the first desktop build looks polished. It is whether the build proves the loop described in the brief. If a platform disappears, a key cannot be collected, or a touch player cannot recover after falling, fix that evidence before expanding the map.
Three realistic mobile-first examples
Example 1: A six-stage obby
On mobile, define six obstacle types, draw their order, specify checkpoint locations, and list success and failure feedback. Prepare reference colors and a two-minute target run. On desktop, assemble the obstacles, script checkpoints, verify character movement, and test touch controls. The mobile phase saves planning time, but collision and checkpoint behavior are not complete until Studio testing passes.
Example 2: A small collectible hunt
On mobile, write the rule for collecting ten objects, decide whether progress persists after respawn, list three environmental zones, and create an asset manifest for collectibles and landmarks. If you use AI-assisted 3D concepts, mark them as candidates. On desktop, import each asset, set collisions and streaming behavior, implement collection state, test reset cases, and confirm that the UI does not cover touch controls.
Example 3: A social hangout prototype
On mobile, map the spawn area, three interaction spots, moderation-sensitive features, and a simple onboarding message. Write acceptance criteria for sitting, chatting, moving between zones, and leaving the experience. On desktop, build the place, use Roblox-supported services and permissions, test multiple players, review privacy and safety settings, and publish privately to an authorized test group before considering a public release.
All three examples use the phone for decisions and specifications. None treats the phone as proof that the final Roblox experience works.
Common mistakes in a mobile-to-Studio workflow
Mistake 1: Calling a browser preview a finished Roblox game. A visual prototype can validate art direction or a basic loop, but it does not prove Roblox data-model structure, Luau behavior, permissions, device support, or publishing readiness. Fix this by labeling every external artifact as a prototype, reference, or import candidate.
Mistake 2: Collecting assets without an inventory. A folder full of unnamed images and models creates duplicate work and rights risk. Fix it with one manifest that records source, owner, license, file format, purpose, version, and Studio review status.
Mistake 3: Treating generated code as integrated code. Logic drafted on mobile may omit the correct server/client boundary or object hierarchy. Fix it by connecting each script to an explicit Studio location and a test case. No script is accepted merely because it looks plausible.
Mistake 4: Testing only the happy path. A game can work once and still fail after respawn, reconnection, rapid input, or a missing asset. Add failure cases to the mobile test plan, then reproduce them in Studio. Record the expected and observed result rather than writing “works.”
Mistake 5: Publishing publicly as the first test. Roblox experiences are private by default, and visibility, audience, account, and compliance rules can change. Use a private or appropriately limited review state, follow current official guidance, and identify the person authorized to publish.
Mobile-to-desktop handoff checklist
Before leaving the mobile phase, confirm:
- The core loop fits in one sentence and has observable win and fail states.
- The level sketch names spawn, goal, obstacles, checkpoints, and recovery paths.
- Every asset candidate has a source, rights note, format, version, purpose, and review status.
- Logic notes identify the trigger, state change, feedback, failure case, and reset behavior.
- The desktop owner and target Roblox experience or group are known.
- The test matrix includes keyboard and touch behavior where applicable.
- Publishing ownership, visibility, metadata, and compliance review are assigned.
- Nothing in the package claims that an untested prototype is a finished Roblox experience.
Once these checks pass, the most productive next action is a short desktop Studio session focused on one playable slice. Import only the assets needed for that slice, implement the smallest complete loop, test it, and record failures. Mobile planning has done its job when the desktop builder can start from decisions instead of guesses.
FAQs
Can you make a complete Roblox game only on a phone?
Not through the complete official Studio workflow. Roblox documents Studio as a Windows and macOS application. A phone can help with game design, prompts, reference collection, asset inventories, and test plans, but assembly, script integration, Studio playtesting, and publishing still require an appropriate desktop workflow.
Is there a mobile version of Roblox Studio?
Roblox's current Studio setup documentation lists Windows and macOS rather than iOS or Android. You should check the official setup page for future changes, but do not install unofficial apps that claim to be Studio or give them account credentials, project files, or publishing permissions.
What useful Roblox development work can I do on mobile?
You can define the core loop, sketch a level, write win and failure rules, collect visual references, prepare an asset manifest, draft logic requirements, and create a playtest checklist. Each task should produce a concrete handoff artifact that a desktop Studio user can verify and implement.
Can AI create Roblox assets while I am on my phone?
AI-assisted tools may help create concepts, images, models, or prototype directions, depending on the verified product capability. Treat every output as a candidate rather than a Studio-ready asset. Record its source and rights, then inspect format, scale, hierarchy, materials, collision, rigging, and performance after desktop import.
Can SEELE publish a game directly to Roblox?
This article makes no direct-publishing claim. SEELE is used here only as a possible preparation layer for natural-language briefs, prototypes, asset concepts, and logic outlines. Final Roblox assembly, verification, permissions, device testing, and publishing remain in the official Roblox Studio and Creator Hub workflow.
What should I transfer from my phone to my computer?
Transfer one versioned handoff package containing the game-loop brief, level sketch, asset manifest, reference links, logic requirements, acceptance criteria, and device test matrix. Avoid sending loose unnamed files. The desktop builder should be able to trace every asset and decision without reconstructing your intent from chat history.